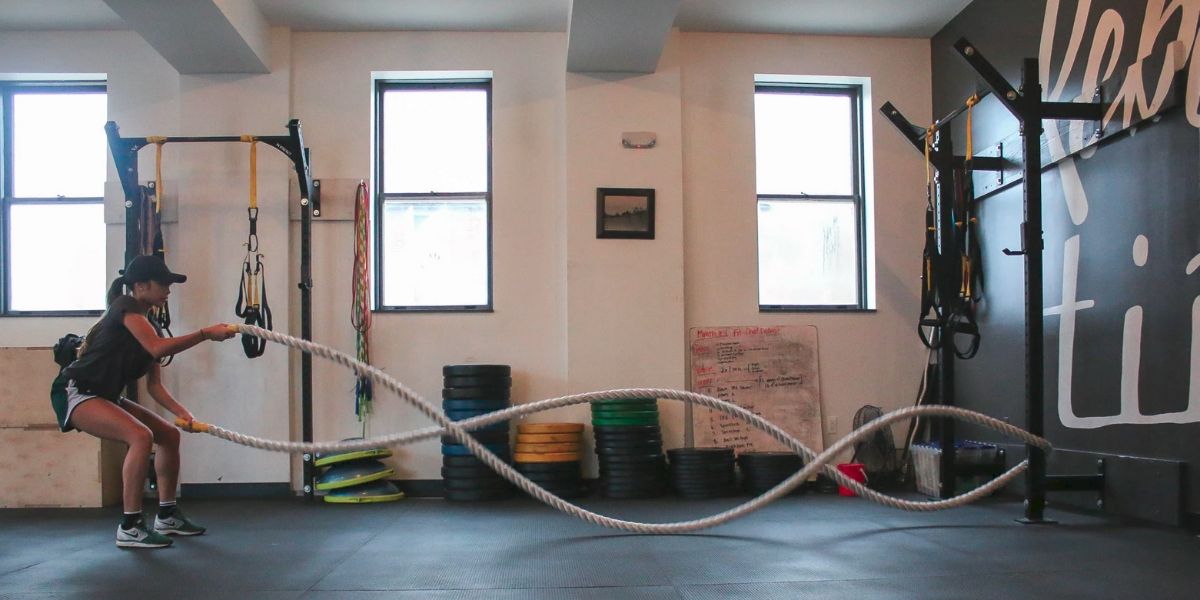
You can make DIY battle ropes for practically zero expense using almost anything long and flexible, like a garden hose or standard utility rope.
More affordable battle ropes go for about $50. But what if you could make your own for nothing? You probably have everything you need laying around your house. Anything you don’t have can probably be had for just a few bucks.
Are you ready to learn how to make your own battle ropes on the cheap? Let’s dive in.
What Can You Use For “Rope”?
Rope can be almost anything long and flexible. Here’s some ideas.
- Utility rope – Many kinds of synthetic and natural fibers are used to make utility rope. The weights vary greatly. Use what you can find. You can braid as many strands of rope together as necessary to get to the diameter and weight you want. If you happen to get your hands on a pretty long length of rope and have some time to invest in the process, you can tie many knots along the length of the rope to make a shorter rope with all the weight of a long one.
- Garden hose – There are many different thicknesses available. Stronger hoses are generally heavier. Again, use what you can find.
- Fire hose – This is what I used. Call around to some fire departments. They may give you an old decommissioned hose. Ask for a delivery hose. They range from three to six inches in diameter. They’re heavy-duty runner and tightly covered in tough fabric.
- Chain – You may be able to find a long chain at a junkyard. Or maybe you can find a bunch of small chains to attach together with some carabiners. Chain makes a good, heavy outdoor battle rope. And you’ll probably be the only person you know with a battle chain.
What You’ll Need
Everything on this list has many substitutes. You can use electrical tape instead of duct tape, for example.
Finding my “rope” was the most fun part about this for me. It was technically free, but I ended up donating $20 to my local volunteer fire department for the old fire hose that I used for my rope. Everything else I used, like duct tape, scissors, hacksaw and carabiner, I found in my garage.
Anyway, here’s what you’ll need to make your DIY battle rope:
- ”Rope” – This can be anything that can function as a utility rope in a pinch. Old garden hose, fire hose, thick rope, thinner ropes braided together and even pneumatic hose can all be used. Something about 1-½” to 2” in diameter is ideal, but weight is more important than thickness. You want to end up with something around 25 to 55 pounds, depending on the resistance you want. Consider your length as well. You want it to be a total of 15 to 60 feet long. Think about the end result when scavenging for your rope.
- Duct tape – This will serve as your handles. You can also use electrical tape.
- Anchor – This is optional. You can always just loop your homemade battle rope around practically anything in your home gym or yard. Use a commercial battle rope anchor if you have one. But ingenuity is your best friend here.
- Tape measure – You’ll need this to mark the length of your rope before you cut it.
- Hacksaw – This is what I used to cut through my fire hose. A good hacksaw will cut through just about anything. Choose something that will work best for whatever is going to serve as your rope. A PVC cutter will work for a garden hose, and a sharp serrated knife will make short work of maritime rope. You get the idea.
- Butane torch – Or you can use a regular lighter or candle. What you need this for is melting any frayed ends on the ends of your rope
that result from cutting it. You won’t need this for a garden hose, but you will if you use rope. I needed it to melt the frayed fabric on my fire hose. - Sand or water – You’ll need something to add some weight to your rope if it isn’t heavy enough. Obviously, this would only work if you’re using something hollow, like a garden hose.
How To Make Your Own Battle Ropes
Not all of these steps will apply to everyone. Skip anything that doesn’t make sense.
- Measure it out – You’ve already decided on your length, right? Stretch your rope out on the floor and mark your cutting point.
- Cut your rope – Try to make the cut as clean and neat as possible, especially if your rope is something that may fray at the place where you cut it.
- Torch the frayed ends – You can skip this if you’re using a garden hose or something similar. Melting the frays doesn’t just make for a neater look and a more professional result. It will keep the frays from getting worse, which could eventually cause a rope to actually unravel. Just be careful not to melt too much material.
- Wrap your handles – If using tape, just wrap several layers around the ends of your rope. You want your grips to be about eight inches wide. If you want really comfortable grips, you can use some thin foam. Cut a piece as wide as you want your grips and long enough to wrap around the diameter of your rope a few times. Wrap the foam around the ends of your rope, them make the wraps with your tape.
- Add your weight, if needed – Weigh your rope at this point, if you can. My 30-foot length of fire hose ended up weighing right at 32 pounds. That’s all I really wanted. But maybe you need some more weight.You can add some if you used something hollow, like a hose. Filling it with sand is a tedious and somewhat messy process, but it works to add resistance to your eventual workouts. Use a funnel to make things easier on yourself. About eight pounds of sand will fill up a standard 25-foot garden hose.
- Anchor your new battle rope – There’s like a hundred ways to anchor a battle rope. Just looping it around a solid and heavy object will work. A big carabiner attached to a hook in your wall is a pretty easy way to do it. You just loop your rope through the carabiner in that case. If you have some kind of horizontal bar attached to something heavy, you can use a ratchet strap to secure the middle of your rope to it. A hose clamp also comes in handy for anchoring. Loop your rope around any heavy object and grab your rope by the ends. Walk back as far as you can. Then slide the hose clamp over the ends and all the way up to where it’s looped. Then tighten the clamp.
Summary
I hope you enjoyed this battle rope DIY tutorial. Don’t be afraid to share it around and show your buddies how to make your own battle ropes. There are many people like you and me who want a good set of ropes without spending a bunch of money. Do you have any ideas about what to use for a battle rope? Tell us in the comments. And when you make your own workout rope, come back and tell us how you did it.
Battle Rope Resources
These articles are all you need to get started with battle ropes.

- 5 Best Power Towers For Your Home Gym - July 19, 2023
- What Does Natty Mean in Body Building? Is It Good or Bad? - June 26, 2023
- How Much Creatine Is In Bang? The Amount Might Surprise You - June 25, 2023